Showing posts with label Recipes. Show all posts
Palomino's Spicy Rigatoni Bolognese
I'm a huge fan of pasta. That carb goodness mixed with rich Italian sauces is complete heaven to me. A yummy local restaurant serves a Spicy Rigatoni Bolognese that ranks pretty high on my list of favorites. And since we're not able to visit as often as I crave this yummy meal, I had to find a copycat recipe that was worthy of the name. Not only is this one delicious, it can be made in about 30 minutes! I'll even share it with you.
Ingredients:
1 lb Hot Italian Sausage (I go to a meat market for this to make sure the sausage is top quality)
1/4 tsp. Crushed Red Chili Pepper Flakes
1 can Crushed Tomatoes (I'm with Ashley and like to use San Marzano)
2 tbsp Minced Parsley
2 tbsp Minced Garlic
1 small jar roasted red peppers chopped (drained)
2 tbsp Dried Oregano
1 cup Heavy Cream
1 package Rigatoni noodles
Brown the sausage in a large saucepan over medium-high heat. Add tomatoes in juice, garlic, chili pepper flakes, red peppers, parsley and oregano. Reduce heat to low and simmer uncovered for 20 minutes.
Cook rigatoni in a separate pot of boiling water. Overcooked pasta is a huge no-no in my book. As a rule of thumb, I wait to pour in my pasta until the water is at a rolling boil. Pour in your pasta with a bit of salt and set your timer according to the lowest time suggested on the package. Stir occasionally to avoid sticking. Take out about a cup of the pasta water before draining.
Add heavy cream to sauce. Cook an additional 5 minutes while stirring to warm through. Add the rigatoni to your sauce. Salt and pepper to taste. In case your sauce is too thick (having to wait to serve, etc.) add a little of the pasta water, 2 tbsp at a time, to loosen it up. Top with freshly grated parmesan cheese and enjoy!
Yummmmm. I know what I want for dinner...
My Favorite Kitchen Gadget
Washington State's annual fair is a family tradition. Between the warm scones, elephant ears and roasted corn, it's something we look forward to each year. Aside from the food, one of our favorite stops has become what we like to call the "gadgets" tents. Inside is a plethora of goods being sold that you likely won't find in any retail store. Over the years, my sweet mom has been suckered into buying some pretty disappointing products like pet hair removers and tupperware lids. But one product has kept us coming back for more - The Salsa Maker.
This hand-powered tool chops and minces quickly and easily with perfect results. It also comes with several attachments for whipping, juicing, shredding and slicing. I pretty much stick to the classic chopping blades but it's nice to have the extras anyway. My favorite uses are mirepoix (carrots, onion and celery) for soup starters or even strawberries as a perfect shortcake topping. But most often, we use it for perfect pico de gallo that I'll even share our recipe for:
Ingredients:
2-3 Roma Tomatoes
1 small sweet onion
1 jalapeno (less if you aren't a fan of spice)
1 tablespoon minced garlic
Seasoned salt
Pepper
Slice your tomatoes in quarters and toss into salsa maker. After cutting off top and bottom, peel off outer onion layer and toss into the maker. Add as much jalapeƱo as desired. The more you add and the more seeds you add, the hotter your salsa will be. For your first time, scrape out all of the seeds and use about half of your pepper. Add your garlic and a few shakes of seasoned salt and pepper. Close and crank your salsa maker until you've reached the desired consistency. (Mine takes about 8-10 revolutions.) Add salt and pepper to taste.
Above is after just a couple of turns. You can see how quickly all of the ingredients are getting chopped and combined.
The finished product. Everything is super fresh and tastes delicious with tortilla chips or on tacos. We even love to put a little on our tri-tip steak. Yummy.
For a bonus, make a little guacamole by mashing up 1-2 avocados with a fork in a bowl. Add some of your freshly made pico with a dash of extra garlic, salta and pepper. Voila! Table side guac made to perfection.
This hand-powered tool chops and minces quickly and easily with perfect results. It also comes with several attachments for whipping, juicing, shredding and slicing. I pretty much stick to the classic chopping blades but it's nice to have the extras anyway. My favorite uses are mirepoix (carrots, onion and celery) for soup starters or even strawberries as a perfect shortcake topping. But most often, we use it for perfect pico de gallo that I'll even share our recipe for:
Ingredients:
2-3 Roma Tomatoes
1 small sweet onion
1 jalapeno (less if you aren't a fan of spice)
1 tablespoon minced garlic
Seasoned salt
Pepper
Above is after just a couple of turns. You can see how quickly all of the ingredients are getting chopped and combined.
The finished product. Everything is super fresh and tastes delicious with tortilla chips or on tacos. We even love to put a little on our tri-tip steak. Yummy.
For a bonus, make a little guacamole by mashing up 1-2 avocados with a fork in a bowl. Add some of your freshly made pico with a dash of extra garlic, salta and pepper. Voila! Table side guac made to perfection.
Recipe: Penne with Bolognese Sauce
We have a Friday night tradition in our house of cooking a meal together that we then enjoy kid-free while catching up on our DVR. For these Friday dinners, we often try to perfect our own version of favorite foods and unlike most of our weeknight cooking, we don't cut corners or try to be particularly health-conscious--these meals are a celebration of making it through the week.
On a rainy Friday a few weeks back, I decided to attempt Ragu Bolognese, the famous meat sauce from Bologna, which could arguably be considered the foodie capital of one of the world's foodiest countries. It's not difficult, and somehow simmering aromatics, whole milk, tomatoes, and plenty of meat on the stove for a few hours creates something that's way more than the sum of its parts.
Being married to an Italian-food-obsessed wife for almost ten years, my husband has eaten a lot of pasta. So when he took a bite of this penne and proclaimed it the second best pasta he's ever eaten (because nothing can compare to the bucatini all'amatriciana we had in Italy), I knew I had a winner. Give this sauce a try the next time you have a dinner party--or just want a special meal for two. If you're looking for sides, go with an arugula or kale salad with a lemony dressing and a little shaved parmesan--something bright and slightly acidic to balance the richness of the pasta.
A few tips:
- Try to chop your veggies as uniformly as possible into small pieces. It's worth the extra effort.
- This recipe is made for a special occasion, so don't try to make it "light" or cut calories. Use whole milk. Don't buy 99% lean ground beef. It's good to live a little, right?
- The quality of canned tomatoes will make or break a recipe. I always use San Marzano brand (bonus: the packaging is beautiful). They're expensive, but they really make a difference.
- Bolognese is traditionally served with fettuccine or pappardelle (long noodles), but I like how shorter, ridged pasta captures all the sauce. Feel free to substitute, but whatever pasta shape you use, don't overcook it. You toss the pasta with the sauce and it will cook a little more.
- If you go to this much effort, top your pasta with good cheese. Freshly grated Parmigiano-Reggiano is the gold standard.
Penne with Bolognese
Ingredients
2 tablespoons olive oil
2 tablespoons butter
2 carrots, finely chopped
2 celery stalks, finely chopped
1 large yellow onion, finely chopped
2 large garlic cloves, minced
2 tablespoons tomato paste
1/2 pound ground pork
1/2 pound ground beef
3/4 teaspoon salt
1/2 teaspoon freshly ground pepper
1/8 teaspoon nutmeg
1 cup whole milk
2 tablespoons red wine vinegar
3/4 cup low-sodium chicken broth
1 28 oz can whole tomatoes
1 pound short pasta, like penne
Grated parmesan
Directions
Heat the olive oil and butter in a large pot or pan with high sides over medium-high heat. When the butter is melted, add the carrots, celery, onion, and garlic. Cook for 6-8 minutes, until softened. Add the tomato paste and cook for 1 minute, stirring constantly. Add the pork and beef, breaking up with a spoon and cook until browned, about 5 minutes. Stir in the salt, pepper, and nutmeg.
Add the milk and cook, stirring occasionally, until the milk is almost completely absorbed, about 10 minutes. Add the vinegar and chicken stock and cook for another ten minutes, stirring occasionally.
Crush the tomatoes with your hands until broken into small pieces. Add to the meat, stirring well to incorporate. Reduce heat and cook at a bare simmer for about an hour and fifteen minutes. Check for seasoning and add additional salt and pepper.
When the sauce is almost ready, cook the pasta in well-salted water until al dente. Drain and add to the pan with the sauce, stirring well. Serve immediately with grated parmesan cheese.
Makes 4 big servings.
Get the printable recipe.
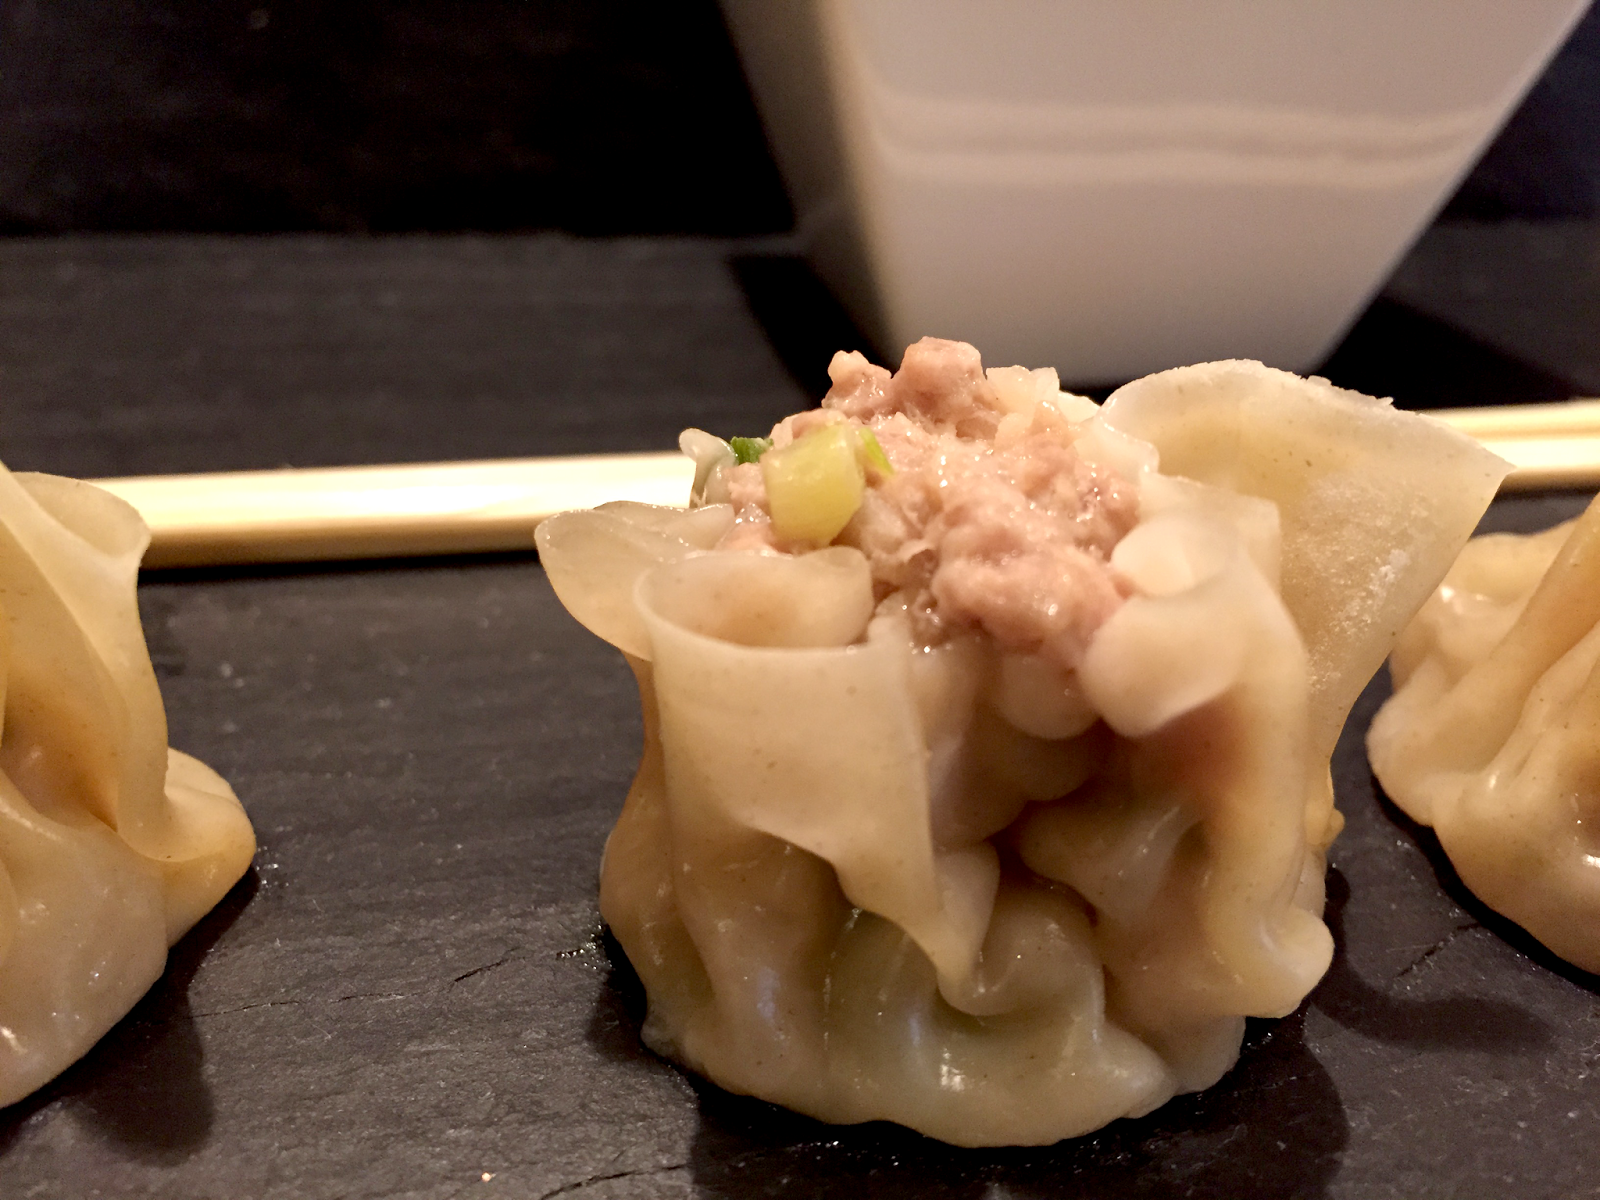
How to Make Dumplings
How can you not love dumplings? When done right, they're pretty little purses filled with juicy, savory goodness. I've always been intimidated to make them at home though.
Until now. Meet my friend Katie.
Besides being a serious world traveler and SCUBA dive master, Katie is also an amazing cook (and she's gorgeous...kind of not fair, right?). She kindly offered to teach me how to make her pork and shrimp dumplings with soy ginger sauce, which are on par with our favorites at Din Tai Fung (maybe even better!).
With Chinese New Year coming up, dumplings are a dish made for a party. I invited a couple friends over and we stood around and chatted as we folded dumplings. Then we chatted some more--mostly about about how amazing the dumplings were--as we ate basket after basket.

Keep reading for step-by-step instructions and Katie's amazing recipe.
Besides being a serious world traveler and SCUBA dive master, Katie is also an amazing cook (and she's gorgeous...kind of not fair, right?). She kindly offered to teach me how to make her pork and shrimp dumplings with soy ginger sauce, which are on par with our favorites at Din Tai Fung (maybe even better!).
With Chinese New Year coming up, dumplings are a dish made for a party. I invited a couple friends over and we stood around and chatted as we folded dumplings. Then we chatted some more--mostly about about how amazing the dumplings were--as we ate basket after basket.

Keep reading for step-by-step instructions and Katie's amazing recipe.
Recipe: Brown Rice Paella
A week before Valentine's Day last year, my husband and I were running errands as he randomly pulled us into a jewelry store. We poked around a bit until I found a ring I absolutely loved. But knowing that it was a little extravagant, I put it on my "someday" list and we went on our way.
Flash forward to our Valentine's dinner. As we ate, Matt started talking about how excited he was to give me my gift. He gave hints like "it's shiny," "it's round," "I know you really wanted it.." I thought, of course, it had to be the ring! But the box he handed me was too large to hold something so small. Instead as I opened it up, I found a paella pan inside. Wah wah wah. Don't get me wrong, it really was a wonderful gift and even went along with all of the hints given. But after explaining my thought process, we now both have a little laugh each time I pull out the pan to make one of our favorite dishes: Paella.
Most recipes for Paella use a lot of seafood and long grain white rice. I use brown rice just to make it a little healthier and stick to chicken and chorizo sausage as our meat. I'll sometimes toss in a little shrimp just to make my husband happy. But this is a kitchen sink kind of recipe so feel free to substitute out ingredients or add more veggies to your liking.
Ingredients
1 lb. chorizo sausage
3 cups cooked chicken
1 medium onion chopped
3 bell peppers of different colors
1 tomato chopped
1 Tbsp minced garlic
4 cups cooked brown rice (I use a box of frozen from Trader Joe's)
2 tsp saffron
1 tsp cumin
2 tsp curry powder (optional)
1 can (2 cups) chicken stock
Preheat oven to 375 degrees. Chop peppers in half. Julienne (cut strips from) one half of each color pepper and set aside. Chop the remaining three halves into small pieces. Cook chopped peppers, onion, garlic and chorizo in paella pan (or oven-safe pan) on medium-high heat on the stove. Once the sausage is cooked through, add saffron, cumin, curry powder and chicken stock. Mix together well. Add small pieces of chicken, tomato, and brown rice. Remove from heat. Arrange your pepper strips in a design on the top of your dish. Place in the oven for about 35-50 minutes depending on how crispy you like the edges of your rice. Enjoy!
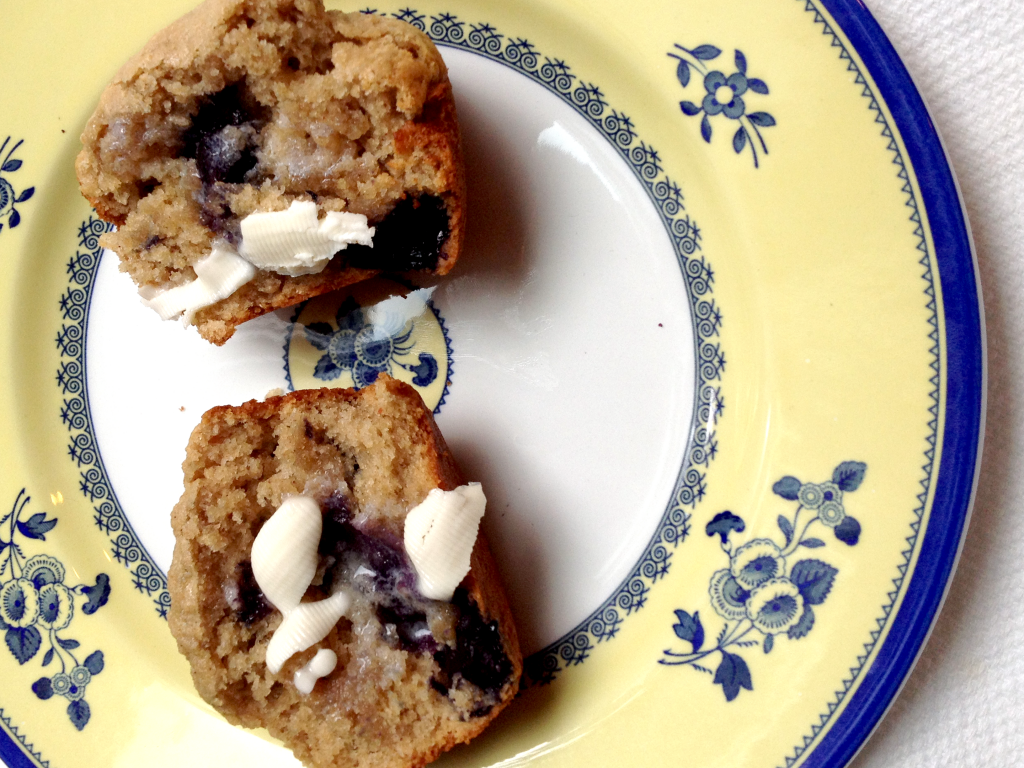
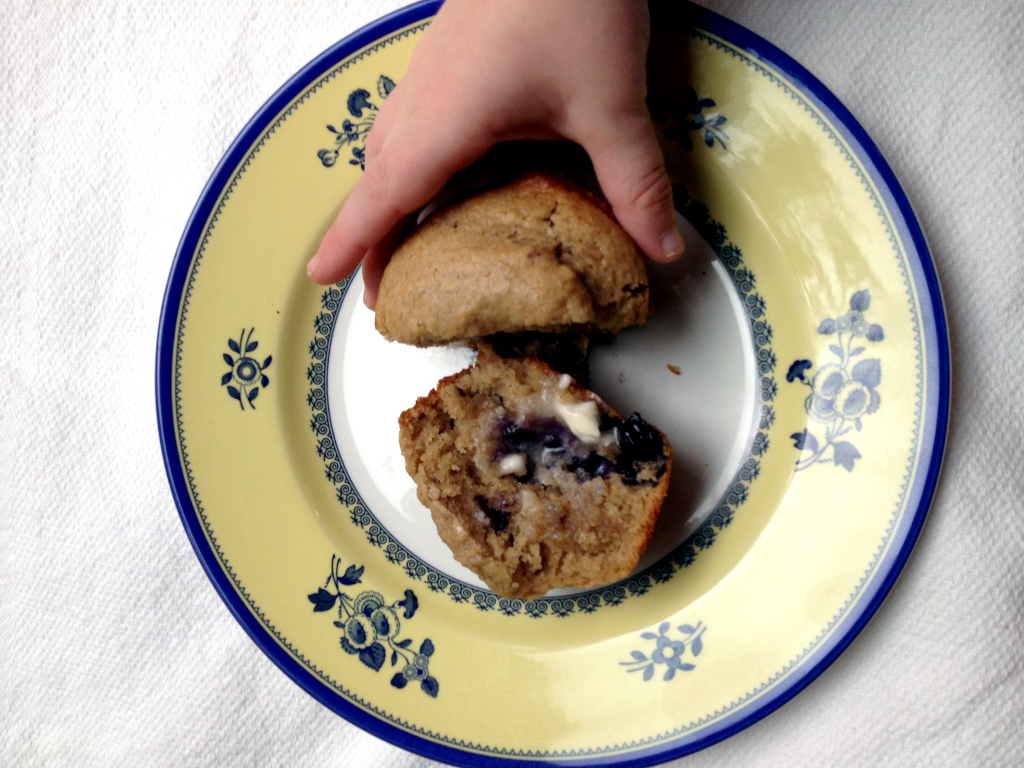
Recipe: Whole Wheat Blueberry Muffins
I love that muffins are a way to eat cake for breakfast without feeling bad about it. These muffins, which can be made partially or completely with whole wheat flour, taste like dessert but are actually pretty healthy.
The secret ingredient is a substantial portion of buttermilk. It makes them tender and moist without requiring tons of butter (not that I don't love tons of butter). I always keep a batch in my freezer for a quick and easy breakfast on the run.
Ingredients
1 1/4 cups whole wheat flour
1 cup white flour (or use all whole wheat; your muffins will be a bit denser)
1 cup brown sugar
3/4 teaspoon salt
1 teaspoon baking powder
1 teaspoon baking soda
1/2 teaspoon ground cinnamon
1 cup blueberries, fresh or frozen
1 teaspoon vanilla
1/3 cup canola oil
1 1/2 cups buttermilk
Directions
Preheat the oven to 400. Grease a standard muffin tin, or line with baking cups.
Stir together the dry ingredients (flour through cinnamon) in a large bowl. Add the blueberries and stir.
In a small bowl, whisk together the vanilla, oil, and buttermilk. Add to the dry ingredients and mix until just combined (over-mixing is the death of good muffins).
Scoop the batter into the prepared pan (I like to use an ice cream scoop for this). All 12 tins will be nearly full. Bake for 15-18 until golden brown.
Let cool in pan for 5 minutes, then remove the muffins and let them cool on a rack until you can no longer wait to eat one.
Recipe adapted from King Arthur Flour.
What's For Dinner This Week? 01.12.15
I always have the best intentions of cooking dinner most nights of the week. But without a plan, my day starts to slip away and by five o'clock, I'm scrambling to get everyone fed. Sometimes I can pull something together with ingredients I have around the house, but admittedly, we end up picking up take out or eating pb&j more times than I care for.
It always helps me to have our meals mapped out for the week so that I can make my grocery list and be ready to go. Knowing the time each meal requires also helps me arrange our schedules to find meals that work best for our busy days. That's why we've decided to share our weekly meal plans to bring you recipe ideas from some of our favorite fellow bloggers. So what's for dinner this week?
Monday: Crispy Black Bean Quinoa Burritos from Two Peas and Their Pod
This recipe works perfect for Meatless Monday. Serving with chips and salsa.
Tuesday: Honey Balsamic Chicken from Our Best Bites
I'll make this with tenderloins instead of legs since I'm not big fan of bone-in meat.
Wednesday: Chicken Pot Pie from Sally's Baking Addiction
Sally has yet to fail me with any of her recipes. I'm excited to try this yummy classic.
Thursday: Slow Cooker Beef with Broccoli from The Recipe Critic
Last week I made Alyssa's Sweet and Sour Chicken and loved it so I'm back for more!
Friday: Chipotle Chicken Chili from The Pioneer Woman
Ree Drummond is my hero. This soup is one of my favorites on a winter day.
Sunday: Pasta with Tomato Cream Sauce from The Pioneer Woman
I'll be able to use some of my left over chicken from the week in my pasta.
What about Saturday? I think it's fair to take a break from cooking at least one night a week. It's a great excuse for a date night or to eat some leftovers. What are you making this week?
Green Smoothies
I have to admit, when I first started seeing green smoothies popping up all over the place, I thought it was just a crazy fad. Sure, people mixed carrots, beets, etc. into smoothies for a little extra nutrients, (V8, anyone?) but drinking something green? Yuck. And then I tried one. We were on our way to Disneyland and had stopped at Jamba Juice for a quick breakfast. Knowing I was in for a day of corn dogs and turkey legs I decided to try get some greens in with a Kale smoothie. I braced myself for the first sip to taste like a salad on steroids, but was presently surprised to find the drink to be absolutely delicious. As someone who isn't good about getting in their daily veggies and greens, I knew I had to find a way to replicate it at home.
Each green smoothie is made up of a collection of three basic parts - liquids, greens and fruits. The ratios above are what I've found to be tried and true for masking any strong taste of greens and maintaining a fruity taste that even my toddler loves. The best part is that you can pick and choose from each column if you have allergies or are looking to add a particular ingredient into your diet.This morning I made my go-to combination: 2 cups cold water, 2 cups spinach, 1 cup frozen pineapple, 1 cup frozen mango, about 5 strawberries (1/2 cup) and a small banana (1/2 cup). I like to buy the large packs of spinach or mixed greens from Costco along with frozen bags of pineapple and mango. That way I always have a good base on-hand for smoothies. I then add whatever fresh fruit I have lying around to tie it all together. I like the flavor well enough with water that I choose not to throw in extra calories with milk or juice, but adding either of those liquids turns your smoothie into a creamy and healthy treat.
I pile my greens into my Blendtec first, grabbing a good two heaping handfuls. I then pour in my cold water. I finish by putting my frozen fruit and fresh fruit right on top.
Mix everything together on the smoothie setting and watch everything combine before your eyes. I have to give advanced warning for this part of the process because the blender is LOUD. Without a heads up by daughter has a minor temper tantrum.
Pour it into a mason jar or glass and add a straw. (Or just guzzle it down from a glass.)
Deeeeelicious! If you're up for a challenge, you can try adding things like chia seeds, flax seeds, hemp protein or acai powder. They serve as little boosts to make your smoothie extra nutritious. What's your favorite combination?
Get Wild With Water
One of winter's biggest woes is how cold and dry the air is. It makes people like me, who already have a hard time getting in the recommended eight glasses of water each day, really struggle. As a result, my skin is dry, my lips feel chapped and I just don't feel all that great.
Part of my resolutions was to be more conscious of what I'm putting into my body. A big part of that is drinking water as my main beverage. While I already don't drink alcohol, I'm trying to steer clear of pop (even my beloved Diet Coke and Dr Pepper) and other sugar-filled drinks. Instead, I'm keeping a water bottle with me at all times to get in that much needed H20.
And though, the benefits of water should be motivation enough to drink, I admittedly get bored with drinking the same thing all the time. I need a little complexity. And after finding such a love for tea, I decided to take a similar approach to mixing up my water selection.
Introducing: flavored water. Ok, ok. I know, it's not a new concept. But I appreciate a friendly reminder (or two) on how simple and diverse the possibilities are. To get your creative water juices going - pun intended - here are a few no-fail combinations that are favorites at my house:
The quantities all depend on how strong you want the flavor to be. The more you add, the stronger the flavor. Also, the time the fruit is allowed to sit in the water will make the flavor more potent. You can add your fruit, veggies and/or herbs the night before for an extra wow factor. This pitcher and this water bottle are good options if you're trying to keep your water clear from chunks of your enhancers as you drink. Mix and match combinations above to find your favorite!
Part of my resolutions was to be more conscious of what I'm putting into my body. A big part of that is drinking water as my main beverage. While I already don't drink alcohol, I'm trying to steer clear of pop (even my beloved Diet Coke and Dr Pepper) and other sugar-filled drinks. Instead, I'm keeping a water bottle with me at all times to get in that much needed H20.
And though, the benefits of water should be motivation enough to drink, I admittedly get bored with drinking the same thing all the time. I need a little complexity. And after finding such a love for tea, I decided to take a similar approach to mixing up my water selection.
Introducing: flavored water. Ok, ok. I know, it's not a new concept. But I appreciate a friendly reminder (or two) on how simple and diverse the possibilities are. To get your creative water juices going - pun intended - here are a few no-fail combinations that are favorites at my house:
The quantities all depend on how strong you want the flavor to be. The more you add, the stronger the flavor. Also, the time the fruit is allowed to sit in the water will make the flavor more potent. You can add your fruit, veggies and/or herbs the night before for an extra wow factor. This pitcher and this water bottle are good options if you're trying to keep your water clear from chunks of your enhancers as you drink. Mix and match combinations above to find your favorite!
Fancy Fake: Truffle Oil
My dad once returned from a business trip in NYC with a shocking story. At a swanky Manhattan restaurant, the waiter offered the option to add truffles to the risotto. My dad declined but his client accepted, adding $75 to the bill in the process.
$75 for mushroom shavings?! As a kid, I couldn’t imagine a worse waste of allowance money. Now, I can’t figure out why my dad passed it up when he was paying with a corporate card.
Nothing tastes like luxury more than truffles with their earthy, complex flavor. Luckily, there’s a way to get that deliciousness without breaking the bank.
For this addition of Fancy Fake, meet truffle oil. A few drops turn even the most mundane items into something special.
A little bottle will run you between $10 and $15, but since you only need a little bit for each recipe, it has a decent cost per use ratio. I usually buy mine at World Market but noticed that Trader Joe’s has started carrying it too. Amazon is also a good option.
Tips:
Truffled Ketchup
Add a little sophistication to this most basic of condiments by adding a few drops of truffle oil to your ketchup. It takes fries to a whole new level.
Mix 1 cup ketchup with 1teaspoon of truffle oil.
Parmesan Popcorn
For a grown-up movie treat, toss your popcorn with butter, truffle oil, sea salt, black pepper, and parmesan. This also makes a great appetizer for a casual get-together.
Add 2 tablespoons of melted butter to 6 cups of popped popcorn (air popped or plain microwave popcorn). Drizzle with 2 teaspoons of truffle oil and ½ cup finely grated parmesan cheese (use Parmigiano-Reggiano for a real splurge). Sprinkle with flaky sea salt and freshly grated pepper.
Pizza with Prosciutto and Arugula
Toss some arugula with truffle oil and flaky sea salt, then scatter on a hot pizza topped with prosciutto. Unbelievable.
Ingredients
1 pound pizza dough (I love Trader Joe’s)
2 cups shredded mozzarella
4 pieces prosciutto, torn into pieces
2 teaspoon thyme leaves
½ cup ricotta
2 cups arugula
2 teaspoons truffle oil
Sea salt (I like Maldon)
Black pepper
Directions
Preheat oven as hot as it will go (around 550). Roll out pizza dough and put on a cookie sheet. Bake the crust for 3-4 minutes. Scatter with mozzarella, prosciutto, and thyme. Add dollops of ricotta. Bake for 7-8 minutes.
While the pizza is baking, toss the arugula with the truffle oil, a few healthy pinches of sea salt, and black pepper. As soon as the pizza is done, scatter the arugula on top.
Get the printable version.
$75 for mushroom shavings?! As a kid, I couldn’t imagine a worse waste of allowance money. Now, I can’t figure out why my dad passed it up when he was paying with a corporate card.
Nothing tastes like luxury more than truffles with their earthy, complex flavor. Luckily, there’s a way to get that deliciousness without breaking the bank.
For this addition of Fancy Fake, meet truffle oil. A few drops turn even the most mundane items into something special.
A little bottle will run you between $10 and $15, but since you only need a little bit for each recipe, it has a decent cost per use ratio. I usually buy mine at World Market but noticed that Trader Joe’s has started carrying it too. Amazon is also a good option.
Tips:
- When using truffle oil, less is more. Drizzle, don't pour. Start with a few drops and taste before adding more.
- Don't cook with truffle oil. This is a finishing oil--one you drizzle on top of your food as a final step.
- Store your truffle oil in the fridge to extend its shelf life.
Truffled Ketchup
Add a little sophistication to this most basic of condiments by adding a few drops of truffle oil to your ketchup. It takes fries to a whole new level.
Mix 1 cup ketchup with 1teaspoon of truffle oil.
Parmesan Popcorn
For a grown-up movie treat, toss your popcorn with butter, truffle oil, sea salt, black pepper, and parmesan. This also makes a great appetizer for a casual get-together.
Add 2 tablespoons of melted butter to 6 cups of popped popcorn (air popped or plain microwave popcorn). Drizzle with 2 teaspoons of truffle oil and ½ cup finely grated parmesan cheese (use Parmigiano-Reggiano for a real splurge). Sprinkle with flaky sea salt and freshly grated pepper.
Pizza with Prosciutto and Arugula
Toss some arugula with truffle oil and flaky sea salt, then scatter on a hot pizza topped with prosciutto. Unbelievable.
Ingredients
1 pound pizza dough (I love Trader Joe’s)
2 cups shredded mozzarella
4 pieces prosciutto, torn into pieces
2 teaspoon thyme leaves
½ cup ricotta
2 cups arugula
2 teaspoons truffle oil
Sea salt (I like Maldon)
Black pepper
Directions
Preheat oven as hot as it will go (around 550). Roll out pizza dough and put on a cookie sheet. Bake the crust for 3-4 minutes. Scatter with mozzarella, prosciutto, and thyme. Add dollops of ricotta. Bake for 7-8 minutes.
While the pizza is baking, toss the arugula with the truffle oil, a few healthy pinches of sea salt, and black pepper. As soon as the pizza is done, scatter the arugula on top.
Get the printable version.
Updated Classic: Chef's Salad
After several days of serious eating, a salad is just the thing (especially if followed by more fudge). Here’s a fresh, easy update to the classic chef’s salad. The radishes provide bite and crunch, the eggs are cooked until just set, and the tender-crisp green beans are an unexpected addition (use haricot vert if your store has them; otherwise regular beans work just great). Add homemade croutons for extra deliciousness.
This salad is made for variations. Sometimes I add roasted or grilled chicken, boiled potato slices, avocado, or even a little bacon. Switch the croutons for nuts or try feta in place of the Parmesan.
Ingredients
1 head butter or bibb lettuce, torn into medium pieces
4-5 radishes, thinly sliced
½ lb green beans, trimmed
2-3 green onions, thinly sliced
4 eggs
½ cup shaved parmesan cheese
Homemade croutons, optional
Honey-dijon vinaigrette (or your favorite dressing)
Directions
Bring a large pot of salted water to a boil. Add the green beans and cook for 1 minute. Drain and rinse with cold water until beans are cool.
Meanwhile, put the eggs in small pot and cover with water. Bring to boil. Once at a boil, cook for 7 minutes. Rinse under cold water until cool. Then peel under cool water and slice in half.
Arrange lettuce leaves on plates. Top with radishes, green beans, green onions, eggs, and cheese. Add croutons, if using. Drizzle with dressing.
Serves 4.
This salad is made for variations. Sometimes I add roasted or grilled chicken, boiled potato slices, avocado, or even a little bacon. Switch the croutons for nuts or try feta in place of the Parmesan.
Ingredients
1 head butter or bibb lettuce, torn into medium pieces
4-5 radishes, thinly sliced
½ lb green beans, trimmed
2-3 green onions, thinly sliced
4 eggs
½ cup shaved parmesan cheese
Homemade croutons, optional
Honey-dijon vinaigrette (or your favorite dressing)
Directions
Bring a large pot of salted water to a boil. Add the green beans and cook for 1 minute. Drain and rinse with cold water until beans are cool.
Meanwhile, put the eggs in small pot and cover with water. Bring to boil. Once at a boil, cook for 7 minutes. Rinse under cold water until cool. Then peel under cool water and slice in half.
Arrange lettuce leaves on plates. Top with radishes, green beans, green onions, eggs, and cheese. Add croutons, if using. Drizzle with dressing.
Serves 4.
How to Make Homemade Granola
Am I being a control freak (there’s always a good chance) if I set breakfast at a certain time?
Maybe I could make pancakes...but I hate making pancakes.
Eggs? Some people are really grossed out by eggs.
Are donuts too heavy for weekdays?
Does cereal say “I don’t care?”
Am I neurotic?
Just a sampling of my inner dialogue when it comes to making breakfast for house guests. Dinner? Bring it on. But maybe because I'm a diehard cereal girl, early morning entertaining stresses me out. Anyone else feel the same?
In situations like this, I’ve started asking myself, “What would Christine do?” Christine is my mother-in-law and the Boston area’s very own German Martha Stewart. She pulls off legendary dinners for dozens with ease and always has her house stocked with the very best things when we come to visit, one of which is homemade granola.
Now when friends and family come to stay, I set out a jar of granola and some berries (if I'm feeling extra nice) and make sure to have milk and yogurt in the fridge. With about ten minutes of required effort, it’s an easy, make-ahead way to make breakfast feel special and spa-like--no matter what time everyone decides to rise and shine.

With its long shelf life and healthier ingredients, granola also makes a great alternative to baked treats for holiday gifting. Just add a little fancy string and a card.
A few tips for the best granola:
3 cups oatmeal
1½ cups unsalted nuts (almonds, cashews, hazelnuts, etc.)
1 cup shredded coconut
1 teaspoon cinnamon
1½ teaspoons coarse sea salt
1 egg white
¼ cup light olive oil (or coconut oil or canola)
½ cup honey
Mix together oatmeal, nuts, and coconut in a large bowl. Add the cinnamon and salt and mix well.
In a small bowl, beat the egg white then mix in the oil and honey. Pour over the oatmeal mixture and mix until evenly moistened.
Spread the granola in an even layer on your baking sheet. Cook for 35-40 minutes until golden brown. Let cool completely on the baking sheet. Store in airtight container for up to 1 week.
Get the printable recipe.
Bonus: For faster version of fruit crisp, saute your fruit in a bit of butter and sugar until warm and softened. Spoon over vanilla ice cream and top with granola.
Maybe I could make pancakes...but I hate making pancakes.
Eggs? Some people are really grossed out by eggs.
Are donuts too heavy for weekdays?
Does cereal say “I don’t care?”
Am I neurotic?
Just a sampling of my inner dialogue when it comes to making breakfast for house guests. Dinner? Bring it on. But maybe because I'm a diehard cereal girl, early morning entertaining stresses me out. Anyone else feel the same?
In situations like this, I’ve started asking myself, “What would Christine do?” Christine is my mother-in-law and the Boston area’s very own German Martha Stewart. She pulls off legendary dinners for dozens with ease and always has her house stocked with the very best things when we come to visit, one of which is homemade granola.
Now when friends and family come to stay, I set out a jar of granola and some berries (if I'm feeling extra nice) and make sure to have milk and yogurt in the fridge. With about ten minutes of required effort, it’s an easy, make-ahead way to make breakfast feel special and spa-like--no matter what time everyone decides to rise and shine.

With its long shelf life and healthier ingredients, granola also makes a great alternative to baked treats for holiday gifting. Just add a little fancy string and a card.
A few tips for the best granola:
- Line your baking sheet with parchment paper. If you value your baking sheet, don’t skip this step...otherwise, be prepared to chisel, chip, and scrape when the granola cools.
- Cook granola low and slow. I always bake granola at 300 for about 40 minutes. You want a nice golden color.
- Use a beaten egg white to add crunch without more fat and calories. My recipe uses one egg white and only ¼ cup oil for a whole batch.
- Honey can be a pain to measure. To make it easier, measure the oil first and then use the same measuring cup to measure the honey...slides right out.
- Mix up the flavor by using different nut combos. My favorite is a combination of almonds and cashews, but hazelnuts, walnuts, and pumpkin seeds are all great. I don't love dried fruit in my granola, but feel free to stir about 1 cup in after the granola cools.
- Don’t worry about stirring your granola while it cooks. I know, this is heresy to many granola experts, but here’s why I don’t bother: 1) it’s a pain, and 2) I like the granola to cook and cool undisturbed in one piece so I can break it into pieces as big or small as I want.
3 cups oatmeal
1½ cups unsalted nuts (almonds, cashews, hazelnuts, etc.)
1 cup shredded coconut
1 teaspoon cinnamon
1½ teaspoons coarse sea salt
1 egg white
¼ cup light olive oil (or coconut oil or canola)
½ cup honey
Directions
Preheat oven to 300. Line a baking sheet with parchment paper.Mix together oatmeal, nuts, and coconut in a large bowl. Add the cinnamon and salt and mix well.
In a small bowl, beat the egg white then mix in the oil and honey. Pour over the oatmeal mixture and mix until evenly moistened.
Spread the granola in an even layer on your baking sheet. Cook for 35-40 minutes until golden brown. Let cool completely on the baking sheet. Store in airtight container for up to 1 week.
Get the printable recipe.

Bonus: For faster version of fruit crisp, saute your fruit in a bit of butter and sugar until warm and softened. Spoon over vanilla ice cream and top with granola.
Recipe: Lemon Ricotta with Crostini
If you have a party coming up, this is about as easy as appetizers get. Spice up some already-pretty-darn delicious ricotta and serve with homemade crostini (which if you can slice bread, you can make). The ricotta is also yummy as an alternative to ranch dip for veggies.
If you have leftover ricotta, try it on toast or a bagel for breakfast, mix into pasta with herbs and parmesan, dot on top of a pizza, or use in a grilled cheese with some fig jam.
Lemon Ricotta
In a small bowl, stir together 1 cup ricotta, the zest of one lemon, ¼ teaspoon smoked paprika, ¼ teaspoon salt, ¼ teaspoon pepper, and a pinch of red pepper flakes.
To go the extra mile, spoon the ricotta in a cute serving vessel, drizzle with olive oil and sprinkle with a little more pepper and a few more red pepper flakes.
Crostini
Preheat oven to 400.
Cut a baguette on the bias into medium-thick slices.
Lay on a baking sheet and brush each piece with olive oil. Sprinkle with sea salt. Bake until crunchy but still a little soft, about 8-10 minutes.
Winner Dinner: Grilled Bread with Avocado
This may be my most requested recipe, which is funny because I’m not even sure it qualifies as a recipe. This is food at its most simple: few ingredients, minimal prep, and almost no actual cooking. But I think simple food is usually the best and that is definitely the case with avocado bread (as we call it in our house).
Now, you might be wondering about this as a dinner. When we first started making this, we’d do it as a side, but then we realized we didn’t want to eat anything else when we were eating this. If you cut your bread thick and pile on the avocado, you’ll be satisfied. But if you want a little more balanced meal, add a simple salad or some form of grilled meat (promise you really don't need it...)
A couple tips:
Grilling the bread really is key to this dish. If you don’t have a grill, use the broiler, but otherwise it’s worth firing up your grill (even in a downpour...hello, Seattle winter). You want the bread to have some char...don’t take it off too soon!
Ingredients
1 loaf of good crusty bread
2 ripe avocados
1 tablespoon of fresh lemon or lime juice
3 tablespoons extra virgin olive oil
Pinch of red pepper flakes
1 garlic clove, peeled and cut in half
Salt and pepper
Directions
Preheat your grill to 500 degrees.
Cut the bread into thick slices. Drizzle both sides with 2 tablespoons of the olive oil. Season with salt.
To cut avocados, slice in half lengthwise. Take out the pit. Then score each side in little cubes. Use a spoon to scope the flesh right into medium bowl. Add the lemon or lime juice, 1 tablespoon of olive oil, the red pepper flakes, and some salt and pepper. Mash with a fork until combined but still chunky. Taste for seasoning and adjust accordingly.
Grill the bread, about 1 minute per side. Make sure it’s nice and charred on the outside. Take the bread off the grill and rub each piece with the garlic clove (this step is optional, but add a nice flavor layer to the dish). Top each piece of bread with avocado.
Serves 2-4. Can easily be doubled or tripled for a crowed.
Get the printable recipe.
Now, you might be wondering about this as a dinner. When we first started making this, we’d do it as a side, but then we realized we didn’t want to eat anything else when we were eating this. If you cut your bread thick and pile on the avocado, you’ll be satisfied. But if you want a little more balanced meal, add a simple salad or some form of grilled meat (promise you really don't need it...)
A couple tips:
Use a good loaf of crusty bread (I like La Brea, which is usually available in grocery stores). This will ensure a nice charred outside and soft inside.
To cut avocados, slice in half lengthwise. Take out the pit. Then score each side in little cubes. Use a spoon to scope the flesh right into the bowl.
Mash the avocado with a fork. You want a chunky texture.
Grilling the bread really is key to this dish. If you don’t have a grill, use the broiler, but otherwise it’s worth firing up your grill (even in a downpour...hello, Seattle winter). You want the bread to have some char...don’t take it off too soon!
YUM.
1 loaf of good crusty bread
2 ripe avocados
1 tablespoon of fresh lemon or lime juice
3 tablespoons extra virgin olive oil
Pinch of red pepper flakes
1 garlic clove, peeled and cut in half
Salt and pepper
Directions
Preheat your grill to 500 degrees.
Cut the bread into thick slices. Drizzle both sides with 2 tablespoons of the olive oil. Season with salt.
To cut avocados, slice in half lengthwise. Take out the pit. Then score each side in little cubes. Use a spoon to scope the flesh right into medium bowl. Add the lemon or lime juice, 1 tablespoon of olive oil, the red pepper flakes, and some salt and pepper. Mash with a fork until combined but still chunky. Taste for seasoning and adjust accordingly.
Grill the bread, about 1 minute per side. Make sure it’s nice and charred on the outside. Take the bread off the grill and rub each piece with the garlic clove (this step is optional, but add a nice flavor layer to the dish). Top each piece of bread with avocado.
Serves 2-4. Can easily be doubled or tripled for a crowed.
Get the printable recipe.
Subscribe to:
Posts (Atom)